Intrigued by the artistry of the bead and cove joint, I navigated the possibilities of building my DIY outdoor sauna. Embarking on my DIY journey on how to build a barrel sauna led me to explore the world of barrel sauna kits — a gateway to crafting my personalized oasis.
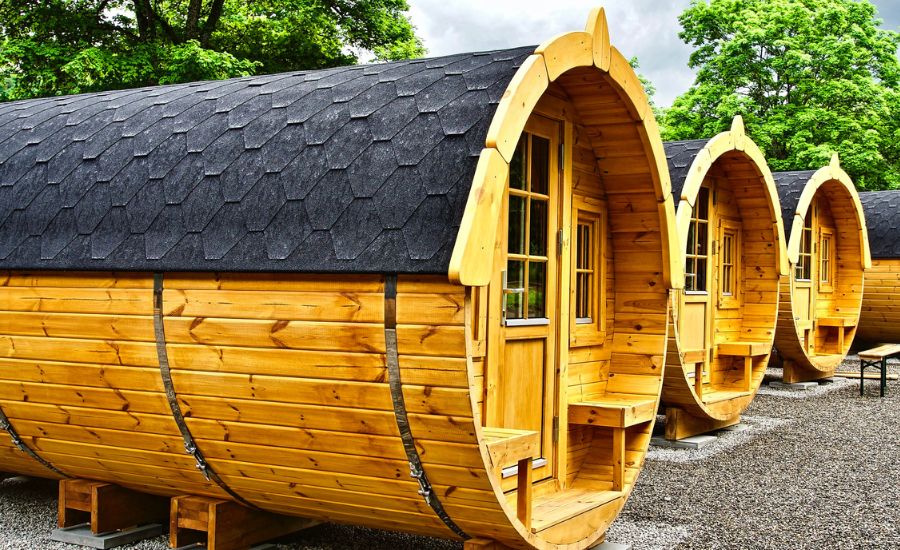
Step 1: Design Your Outdoor Barrel Sauna
If you want to know how to build a barrel sauna, begin with a vivid dream.
- Location. Installed outdoors, will it catch the morning rays or bask in the golden hues of sunset? Selecting the right spot sets the stage for an immersive and harmonious sauna experience.
- Aesthetics. Detail the aesthetic appeal of your DIY barrel sauna. Consider the resilience of your creation in the face of extreme heat.
- Integration. Envision pathways leading to your retreat, surrounded by lush greenery.
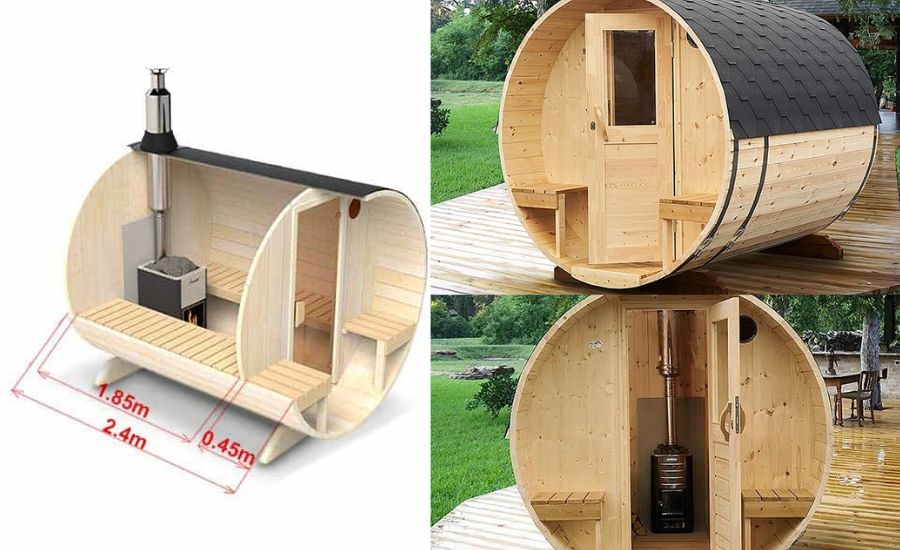
Step 2: Exploring the Convenience of Barrel Sauna Kits
Now that the dream of your DIY barrel sauna has taken shape, let’s delve into a game-changing consideration: the use of a barrel sauna kit.
The beauty of a barrel sauna kit lies in its ability to simplify the intricate process of building barrel saunas.
Sauna enthusiasts discover the unparalleled benefits that come with opting for a kit — convenience, time-saving, and the assurance of a smooth building process.
Assembling a sauna from scratch can be a puzzle, and missing pieces can quickly turn the project into a frustrating challenge. Barrel sauna kits provide the reassurance of completeness — all the necessary staves, hardware, and other components are included, sparing you from the anxiety of hunting down elusive parts.
Practical Tip: Selecting the Right Barrel Sauna Kit
Choosing the right kit is crucial for a successful DIY venture. Consider factors like the size of the sauna, the type of wood included, and any additional features.
Are you drawn to a specific wood variety for its aroma or durability? Does the kit offer customization options to tailor the sauna to your preferences? Answering these questions ensures that the kit aligns seamlessly with your vision.
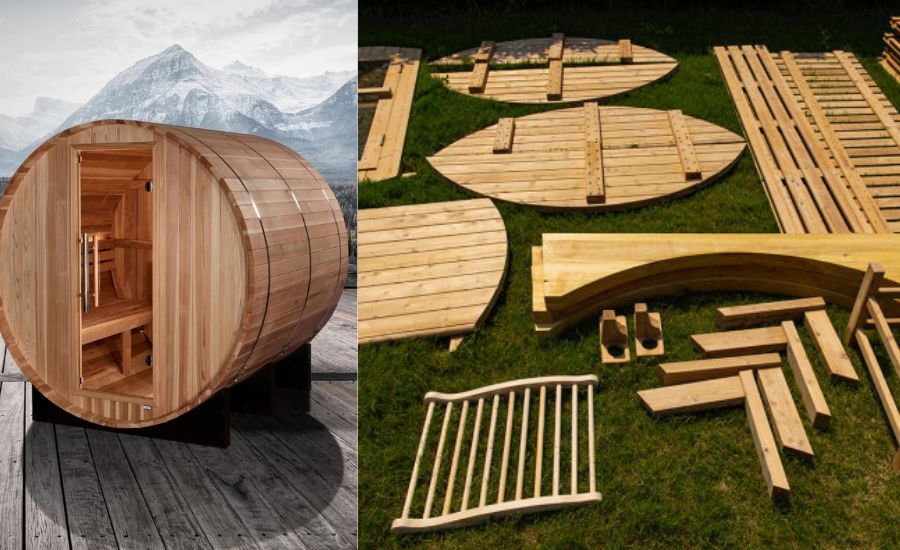
Step 3: Selecting the Right Wood and Tools
As someone who has trodden the path of crafting a sauna from scratch, I’ll guide you through these essential choices with both practical advice and a touch of personal insight.
Wood Selection
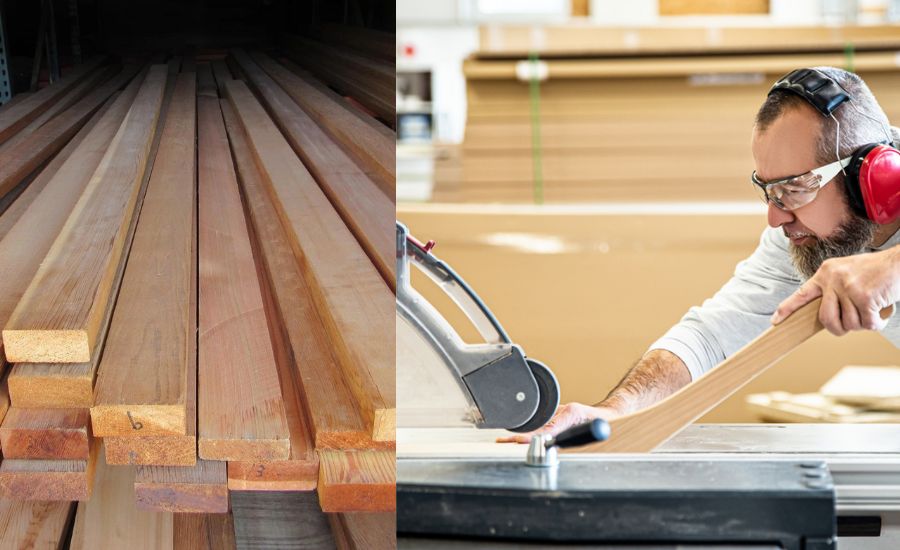
When it comes to choosing the right wood for your DIY barrel sauna, Western Red Cedar emerges as a standout choice. Its naturally resistant properties make it ideal for outdoor exposure.
Clear cedar, with its smooth grain and freedom from knots, adds not just durability but an undeniable touch of elegance.
Prioritize quality over quantity. Opt for wood that is perfectly straight, free from imperfections, and with a smooth surface.
Essential Tools
Equip yourself with a table saw featuring a dado blade, a critical tool for crafting intricate dado joints.
Don’t forget to prioritize safety, using essential safety gear and, notably, the table saw’s safety cover.
Mastering the Router Table
For fine woodworking details and dado joints, turn to the router table. Use cove router bits to create two concave edges. The router table becomes your canvas, allowing you to infuse your creation with personal touches that go beyond functionality.
Concrete Pads and Gravel Bases
Consider laying a solid base using a concrete pad or a carefully prepared gravel base. This not only ensures stability but also prevents the wood from direct contact with the ground, safeguarding your sauna against the elements.
Step 4: Mastering Tongue and Groove Joints
These joints form the backbone of your sauna’s structure. When snugly fitted together, they create a barrier that keeps out moisture and cold air. This weather resistance not only enhances the longevity of your creation but also contributes to a more energy-efficient sauna.
Joints add an insulating layer to your sauna. The snug fit minimizes heat loss, enhancing the efficiency of your wood stove or any other heating source you choose.
Step 5: Constructing
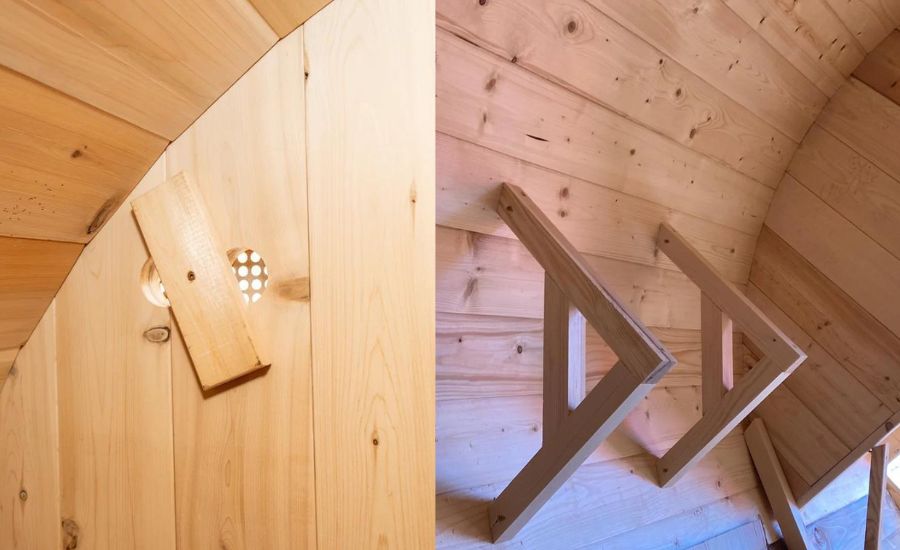
Consider going beyond the basics with additional structural framing.
Aligning the Staves
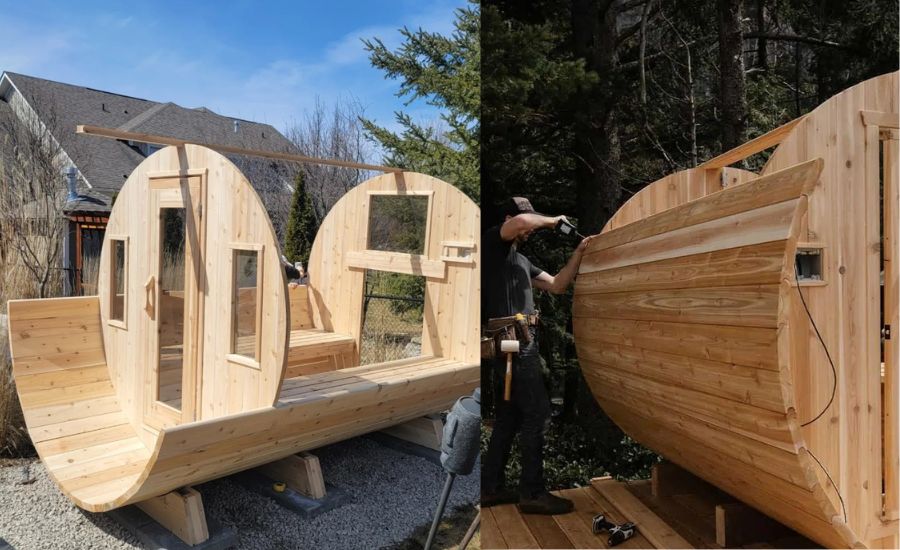
Begin by laying out the staves in the desired sequence, ensuring a smooth and gradual transition from one to the next. Take your time during this step, double-checking the alignment of each stave before securing them.
Securing the Staves
Use dado joints with precision, allowing each stave to snugly interlock with its counterpart. Use a solid deck foundation to provide stability.
Opt for pressure-treated lumber to safeguard against outdoor conditions.
Use a straight flute router bit for clean cuts, contributing to the seamless assembly of staves.
Incorporating Temperature Control
Consider the integration of electric sauna heaters into your barrel sauna design. Plan for their placement within the barrel structure, keeping in mind the optimal positioning for even heat distribution.
Personal Touch
As you construct the barrel shape, seize the opportunity to infuse your personal touch. Use cove router bits to add artistic details with two convex edges. Experiment with cove router bits, starting with a small section to ensure the desired effect before proceeding.
Troubleshooting Common Challenges
If you encounter any gaps or misalignments, do the hat of a problem solver. If necessary, revisit the alignment and adjust individual staves to ensure a snug fit.
Step 6: Adding Finishing Touches
Embarking on the adventure of building a sauna from scratch is about creating a sanctuary with structural integrity and lasting craftsmanship.
Insulation
Consider incorporating insulation material within the barrel structure, paying extra attention to areas around dado joints. This not only enhances the sauna’s energy efficiency but also provides a cozy retreat, regardless of the external temperature. Choose insulation materials carefully, keeping in mind their heat-retaining properties and suitability for sauna use.
Here are some insulation materials commonly used in sauna construction:
| Material | Advantages | Considerations |
| Mineral Wool Insulation | Excellent thermal performance, fire-resistant, and moisture-resistant. | Ensure it is specifically designed for high-temperature applications. |
| Fiberglass Insulation | Lightweight, cost-effective, and widely available. | Select a type with a high-temperature rating, and ensure proper installation to avoid skin irritation. |
| Foam Board Insulation | Good thermal resistance, easy to cut and shape. | Choose a type suitable for high temperatures; may need additional protection to prevent damage. |
| Reflective Foil Bubble Insulation | It reflects radiant heat, islightweight, and is easy to install. | Often used in combination with other insulation materials; ensure proper sealing. |
| Ceramic Fiber Blanket Insulation | Excellent heat resistance, lightweight, and durable. | It may require additional protective layers due to potential skin irritation. |
| Closed-Cell Foam Insulation | High thermal resistance, and moistureresistance, and provides effective insulation. | Check for suitability in high-temperature environments. |
Ventilation
Strategically place vents to facilitate air circulation, preventing excessive heat buildup without compromising privacy. This not only contributes to a more pleasant environment but also promotes the longevity of your sauna. Balance ventilation carefully to maintain the desired temperature inside the sauna.
Customizing
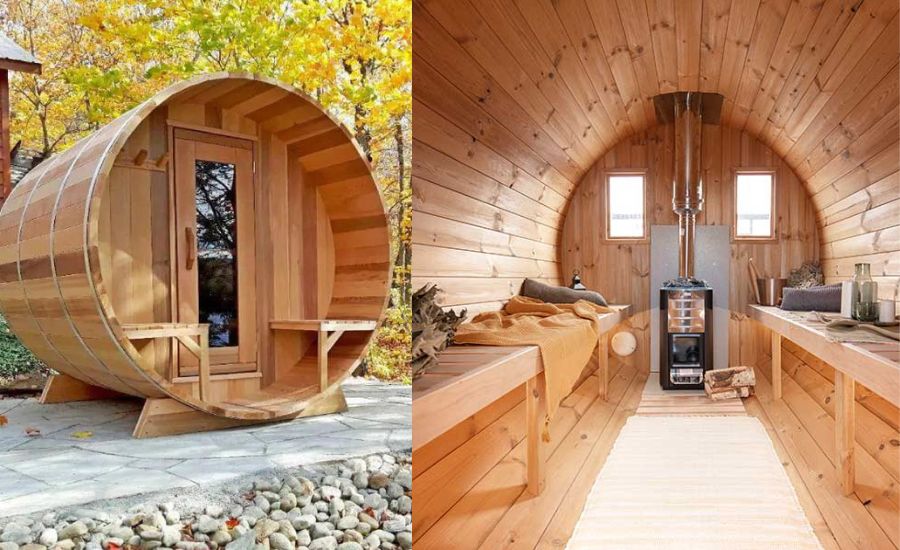
Add windows to invite natural light and create an open atmosphere. Think about the seating arrangement — perhaps built-in benches or a small shelf for essentials. These thoughtful additions enhance both the aesthetics and functionality.
Atmosphere and Lighting
Integrate soft lighting for a soothing ambiance during evening sessions.
Whether it’s wall-mounted fixtures or LED strips, thoughtful lighting enhances the overall experience, making your sauna a retreat for relaxation.
Choose lighting fixtures that are resistant to the heat generated within the sauna. Experiment with different lighting placements to achieve the desired atmosphere.
FAQ
How much does it cost to build your own barrel sauna?
The expense largely depends on various factors, such as the size of the sauna, the quality of materials used, and whether you opt for a kit or source everything individually.
Generally, building your sauna can save you a decent chunk compared to buying a pre-made one. Expect costs varying from a few hundred to a couple of thousand dollars.
Is it cheaper to build your own sauna?
Absolutely! While purchasing a pre-made sauna might seem easier, sourcing materials yourself and investing some sweat equity can significantly cut down on expenses.
Can you make your own barrel sauna?
Definitely! Crafting your barrel sauna is not only possible but also immensely rewarding. With the right materials, tools, and a dash of determination, anyone can create a slice of paradise in the form of a beautifully crafted barrel sauna. Whether you’re a seasoned DIY enthusiast or a newbie, the process is an adventure worth embarking on.
What kind of wood is used for barrel saunas?
When it comes to wood for barrel saunas, durability and moisture resistance are paramount. Cedar and redwood are popular choices for their natural resistance to decay and insects, along with their appealing aroma. These woods not only withstand the elements but also contribute to the sauna experience with their pleasant scent.
How long will barrel sauna last?
A well-constructed barrel sauna, especially when using quality materials and precise craftsmanship, can stand the test of time. Properly maintained, it can last for decades! Regular upkeep, like resealing or staining the wood, goes a long way in preserving the sauna’s integrity. Ultimately, the lifespan can vary based on usage, maintenance, and the wood used.
Takeaways
Embarking on the journey to build your DIY barrel sauna involves careful consideration of materials, tools, and steps to ensure a successful and rewarding project.
Start by selecting high-quality wood, and essential tools such as a table saw with a dado blade, and, if desired, explore the convenience of barrel sauna kits.
Constructing the shape involves aligning and securing staves and troubleshooting common challenges.
Adding finishing touches, including insulation, ventilation, and personal customizations like windows or seating arrangements, transforms your sauna into a personalized haven.
Feel free to explore and experiment with different joints and techniques in your DIY journey — each step adds a personal touch to your outdoor sauna project!

